Wednesday, 28 August 2019

Quilt finished after 4 years

Precisely 4 years ago in august 2015 I made a quilt top that I patchworked with unicolored scraps and grey. Look!
I loved it a lot but didn't know how to finish it. It decoratively hung in my sewing/guest room for quite a while, then into a cupboard. 
I remembered I already cut the binding from the left over pieces of the grey background. But I didn't made a back for the quilt. So this I had to make first. Of course I didn't had any more of the grey from the front. I had two other little pieces of grey fabric and bought the anthracite one.
I made the sandwich with a medium weight filling of 100g/m².

For the quilting I chose an overall pattern. As elder son needs a new quilt, I wanted the quilt pattern to be more masculine than the "normal" meander. After some tries (details in another post) I decided on that one. Not very difficult you think (as me), but technically it isn't easy to make long lines from right to left or left to right without stopping for replacing the hands. That sees a bit but it's nothing really disturbing.

can you find the little mistake in the pattern on this photo? ;-)


I love it! 
The colors still making me happy!

A bientôt,
Jane

Monday, 26 August 2019

Drawings on the beach

This will be the last post about stones, I promise!
At least for this month ;-)

During our summer vacation we had been on a stone beach! There were plenty of signs that it's forbidden to take stones with you, as they are very important for protecting the coast. I understand that well, but it's the first time I saw that they are handing out fines for it! 
Did anyone know where we have been? :-)
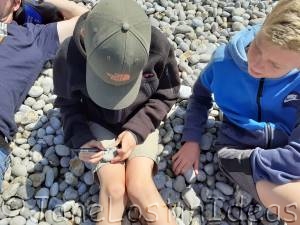
It had been fresh, so no one wanted to swim, but we sat at the beach and looked at the sea and the gorgeous cliffs and of course at the stones around us. There had been very interesting ones with holes, so that you could see something sparkling inside - I didn't steal one! But I had a permanent marker in my bag and we started decorating some stones. 
First with maritime motifs:
Then we saw that some stones already had faces on them. Can you see those two?
And some faces just needed some help to be visible...
When we left we put the stones everywhere on the beach, so maybe every now and then they make someone else smile when he finds one.

A bientôt,
Jane

Monday, 12 August 2019

More and hidden dotted stones

I painted some more stones with little points. 
I had some stones left where I already painted the foundation, so I dotted this two. 
One is for my blue stone collection the other in my favorite warm colors.
And I made some hidden paintings. Our house is on the ground floor sealed with natural stones.
I made some little paintings on stone "scraps" and hid them in the wall. They are very small and you don't see them on first sight. 


I like those secret art spots :-)

A bientôt,
Jane

Tuesday, 30 July 2019

Lutin/dwarf deco frame in summer

I didn't jet showed you the last season decoration for the seasonal deco frame that I started with the kids of my crafting class! This is my frame in the summer version!
The kids wanted to do butterflies. I found an easy instruction (see this link) and the children got it very fast and made lots and lots of them too. 
I later added from last years decorations the little bunting garland and the tulips (a little out of season).
This is the end of that project. The kids liked it too. I hope some might continue and make for the next year their own decorations on it.

A bientôt,
Jane

Friday, 19 July 2019

Dotted stones

Already in June I started with a new stone painting method, that I saw at a neighbors house. Therefor you use small wooden sticks, toothpicks or the round head of a pin, to dot acrylic color onto stones. You can paint a foundation on the stone or leave it natural.
These are my very first ones. I liked the red one best, but I gave it away!
You have to coate the stones with a transparent varnish to make them more resistant.
Younger son liked this painting too and I had the idea that he made for each of his teachers one as a school-years-end-present.
Me too I used some as little gifts and some are still with me.
Two got a christmassy touch, I will keep them for the end of the year.
I also did thoses stones with the kids of my crafting class, but most of the kids couldn't do it as clear as required so their stones are mostly a bit messy. I don't know why! I still think this is very easy to do ... (?)
Anyway, I still have some on my desk that are waiting to be dotted and I have another idea with this technic too. You'll see :-)

A bientôt,
Jane 

Monday, 1 July 2019

Game for the school party

This weekend we had the annual school party. In the morning the kids are presenting a play on stage for the parents, then there is a big BBQ and later games for the kids. I like those games a lot and helping every year. 
This time I made a new game. On a white board I marked with tape a "road". To make it more visible I draw on the tape. The farm stickers on one side had already been on the white board and I just used them as a part of my "map".
With a pipe-clamp and some pieces of the metal-construction-box of my son I made a support for the white board marker, so it can be hold upright with for strings that are fixed on each corner of the support.
For the game every string has to be hold by one person and together they can move the pen over the board, trying to follow the road. It's not so easy, because everybody has to hold his string tight but pulling only in his direction when necessary. You see there have been several wrong turns and the pen went over the taped zones (I didn't had time during the party to take photos, so theese are made afterwards). 

Except that it was a boiling hot afternoon, it was fun playing with the kids! Schoolyear is nearly over now. Today is my last crafting class for this year! We will craft with the paper we decorated last week by spashing color on it. 

A bientôt,
Jane 

Thursday, 20 June 2019

Fabric printing with foam rubber stamps

Hello my blog! Long time no see ;-)

With the kids from my crafting class we made stamps from foam rubber that has been glued onto wood squares. Each one made a stamp for a quarter of a  circle. Then we printed with fabric color on white cloth and we are now in the slow process of sewing shopping bags from it. Only the first four are ready (as I have only one machine for the kids, it takes a while. There is always one on the machine and the others are crafting other projects)
I didn't made a shopping bag for myself, as I have already lots. I did only a test print as an example and also to show the children how to put the color with little sponges on the stamp.
But the other day I thought it's a shame not using it properly and quite spontaneously I took a simple white T-shirt from my drawers and printed on it.
I like how it turned out, even when this photo is not the best.

A bientôt,
Jane