Tuesday, 9 January 2018

Snow flakes on sticks

I wanted to give a little "Thank you" to a friend and bought a Christmas rose (helleborus niger) for her. I love those! They are flowering in a time of the year where there are very little flowers. You can even keep them in pots and they don't mind if it's freezing cold. 
I planted it in a pot and then thought I might add some winterly decorations as well. From a thick branch of firewood I cut round slices, fixed them on sticks and painted snowflakes on them.
You have to use the color very dry and do not paint, dab the color!
There is a white snow flake on one side and a blue one on the other.
I made some sticks for me too and rearanged my front step decoration:
As I already have a very nice flowering white Christmas rose in my garden (it has been my front door decoration two years ago), I bought for me one in a different color. Very interesting flowers as they are more like bells hanging down, but not as eye catching as the white roses.

A bientôt,
Jane

Thursday, 4 January 2018

Last Christmas decoration photos of 2017

Before nobody wants to see any more Christmas stuff (this is for me every year quite early in January) I will show you three crafting projects I did in December. Also with the kids of my crafting clases.

This is a plastic ball that can be filled. With hot glue I fixed a wooden deer and a paper fir tree inside. My boys loved to make some confetti for me that is as snow also inside. A good advice: close the ball with a little glue, so the confetti can't get out again :-) On the upper half of the ball I painted from the outside with a golden pen stars or flakes. 

With the kids I did big lanterns from cardstock. Therefore we cut triangles in black cardstock and covered the openings from behind with transparent paper. Then the kids did decorating the trees with pens and punched out ornaments from colored transparent paper. This is my decoration example:
As it is always a hassle to get lanterns round, we just stapled two rectangle cardstocks together and put heavy wire inside to hold it open. The wire is fixed with scotch and cardstock from the inside. You can remove the wire to store the lantern flat. 

I also stitched stars with the kids. Mainly we made medallions that you can hang in the tree, but also some cards. Some children where quite advanced and they made also difficult stars like the one left on the photo.

So, this is the end of my Christmas season. My resolution for 2018 is to start preparing Christmas much earlier so I have time to enjoy it in December. We'll see if I manage ;-)

I wish you all the best for a happy and healthy new year and that you can do lots of things that you like!

Bonne année,
Jane

Sunday, 24 December 2017

Deers and a little house in the forest

Look what I made for table decoration:
I let the kids in my crafting classes do thoses as well. 


They added some golden stars and a little snow. I told them to only whiten the tips of the trees and I have to say, that looks more alive than mine. I didn't jet had the time to let it snow on my composition.
The half branches where we put it on, are about 35cm long. I could imagine those little landscapes as a table middle on a long table with a much longer branch. Would only be difficult to cut it in the length so it lays flat.
But this year it will do as decoration and for our table I have also my advent composition with candles that's like the one I made last year

I wish you all a very merry Christmas! Have a good time and relax!

Je vous souhaite joyeux noel! Reposez vous et profite bien!

A bientôt,
Jane

Thursday, 14 December 2017

Lots of pillows

Three month ago we bought a long needed new sofa. The old one was so used, we couldn't even donate it. Of course I felt guilty to dump everything, so we took the pieces apart and kept two foam matrasses and lots of cushion inlays. I now have filling material until the end of my life!
I tried to use some up and filled new pillows. Even when I first said I didn't want to, I had last weekend a stand on a private Christmas market and therefor I produced... Sorry for the bad photos, I took them with flash the evening before the market.

First I made a bunch of neck pillowsThey swallow a lot of filling material!
I forgot to take photos before the market and now they are all gone. 

Then I used a quilting exercise for a pillow 55x55cm:

This pillow I thought would be great for a children room. I am happy to sell it to someone who loved it on first view.

In my cupboard I found two little pillow cases that had been with the old sofa, but at that time I have made new ones in a contrasting color, so they had been used very little. I washed them, made pillows for stuffing them and applicated stars. I sold them very cheap as Christmas decoration.

And last I made a big pillow 45x90cm. Could be used on the floor or as a back rest. The basic fabric is sturdy and the color is a dark aubergine (A big scrap, someone gave to me years ago). I decorated it with appicated flowers and quilted tendrils.

I had lot more ideas for pillows, but didn't had the time to realise thoses. 
I also had two white patchwork pillows left that I made two years ago. Don't know why they are not selling. I still like them! Of course the color isn't very practical.

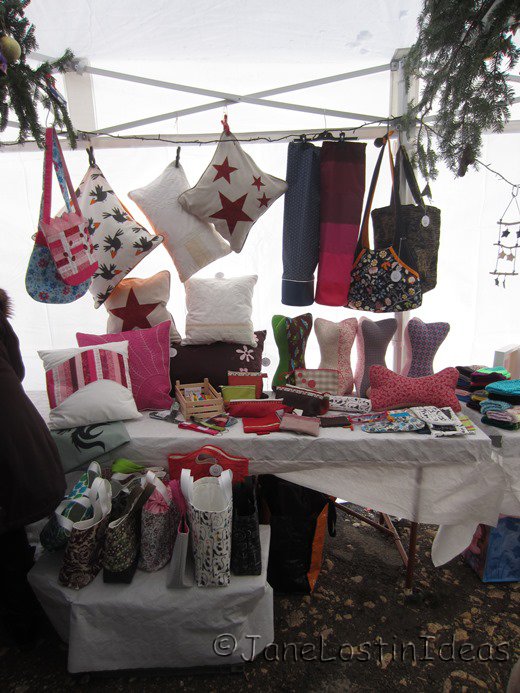
This is my stand on the market. Except of the pillows I only had some bags and pouches I had on stock and my obligatory little bags from wax-cloth.

Unfortunately the market wasn't very frequented so I still have some pillows left and don't know where to store them. Did anybody want's to have one? Please! :-)

A bientôt,
Jane 

Wednesday, 6 December 2017

Socks for St-Nicholas

Hey there! 
I didn't planned to neglect this blog for 2 month! There had been lots of other things taking my attention, stopping me from being creative. Some still do, but I hope I will manage soon to do everything. Maybe in 2018 I become super-woman! ;-)

Today it's St Nicolas day. Normally not a day that we are celebrating, but yesterday youngest-son put his boot out telling me, he wanted to see if it "works". First-son did equally. So mom had to do something. Both don't believe in Santa, so I guess they know who is filling the boots, too. I took out the first advent calendar that I made when the boys had been little. At that time to avoid the risk of an over-excited child opens more than one package per day, I made stockings for everybody and filled them new every day. That's how it has been looking at that time:
Horrible photo!
I made one sock per family member, but mine had been rarely filled with anything. As my husband has other access to chocolate he didn't emptied his every day neither. The boys did! 
I stitched our names in the socks, but you can't read them. The dwarf on the sled is from first-son, the dwarf climbing the rope is little-son (funny, alpine climbing is now his sport :-)), my husband is the Santa-dwarf and mine is decorating the tree (I always wanted to stitch some more details on it, but never finished). 
Yesterday evening I filled those socks with sweets and nuts and dried fruits and hung them up very early today in front of our entrance. 
It has been 5 years now that we didn't used this socks and little son didn't remembered them at all! This is the advent calendar we are using now. I showed it in 2014.

Hope you all had a very nice start in the Christmas-season!

A bientôt,
Jane 

Tuesday, 3 October 2017

Bull's-eye-bag

Sunday I took the time (that I should have used for more important things) and made a completely (un)necessary bag!
A bit of brain jogging to find out how to put in the window without making the complete lining from plastik.
To compensate that you can't hide any secrets inside :-) I added a cover that can be closed by pulling the two stings tight.
I think it's a funny bag, but to be honest: I don't really have use for it!

A bientôt,
Jane 

Sunday, 1 October 2017

Autumn leave printing

I tried a printing technique with leaves that I found on pinterest. You are using fresh leaves and painting them from the back with felt pens in different colors. This is so much less messy than printing with water colors! Still you get colored fingertips so when putting the leave with the color side down on a paper, it is best to cover the leave with a scrap paper so when pressing the leave onto the paper, you are not leaving traces with your dirty fingers.
The results are stunning and I loved doing the printing! 
I did some post cards (there are some autumn birthdays ahead),...
... a page marker,
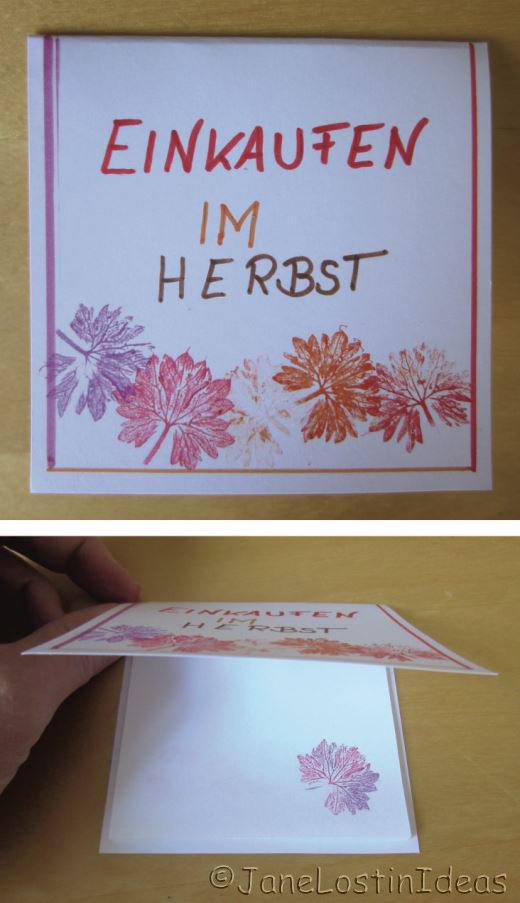
... a note block for shopping lists that is already with a friend of mine,
... and I decorated a notebook.
I also did this printing technique with the kids in my crafting classes. They did really nice works too. I like to show them crafting that they can do also alone at home, not needing lots of special equipment.

A bientôt,
Jane